Emissive Textures in Renders
Introduction
You've probably seen some cool renders of models that stood out to you because parts of them glow. Perhaps you even wanted to try this out on some of your own models. This article will show you how.
In order to create any sort of render, you will need to decide what rendering software to use. If you want to explore the different rendering softwares and view the advantages and disadvantages of each, please see the Rendering Models guide, as this guide won’t go in-depth about general rendering.
This guide will provide in-depth steps for the two most popular softwares, Blender and Sketchfab, but there may be overlap when creating emissive textures with other softwares too. The required steps will be explained in detail for each software, which you can access by either scrolling down or navigating through the table of contents located at the right of the page. As well as explaining the required steps, this guide has an example you can follow along with to help visualize the process. We’ll be creating a render of a desk lamp in both Blender and Sketchfab.
Please note that the methods recommended in the article are not the only ways to achieve emissive textures in renders, but rather are supposed to provide general insight on how you can go about achieving them. You are encouraged to experiment and find the best workflow for you.
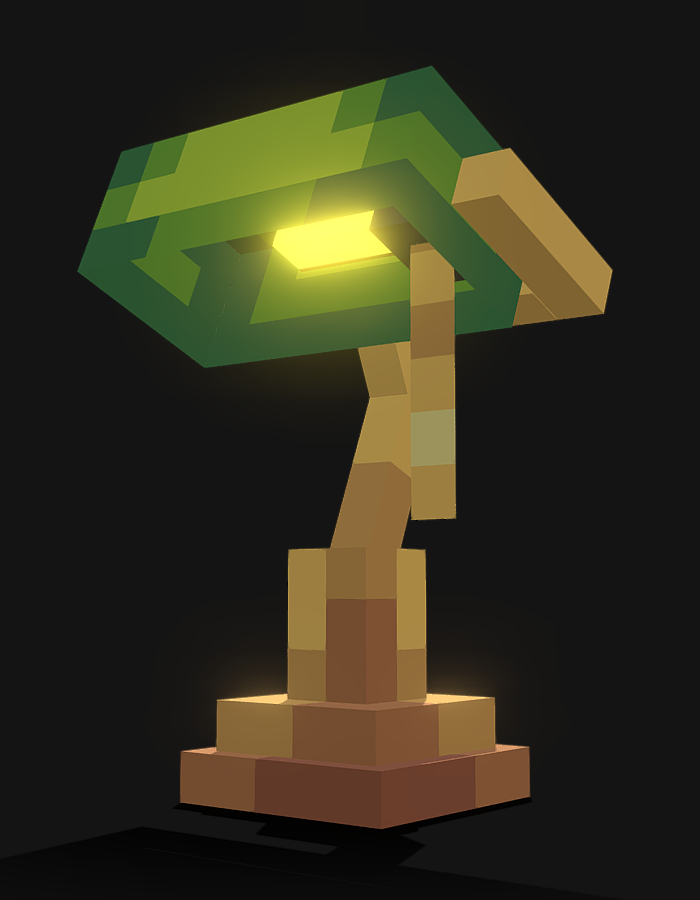
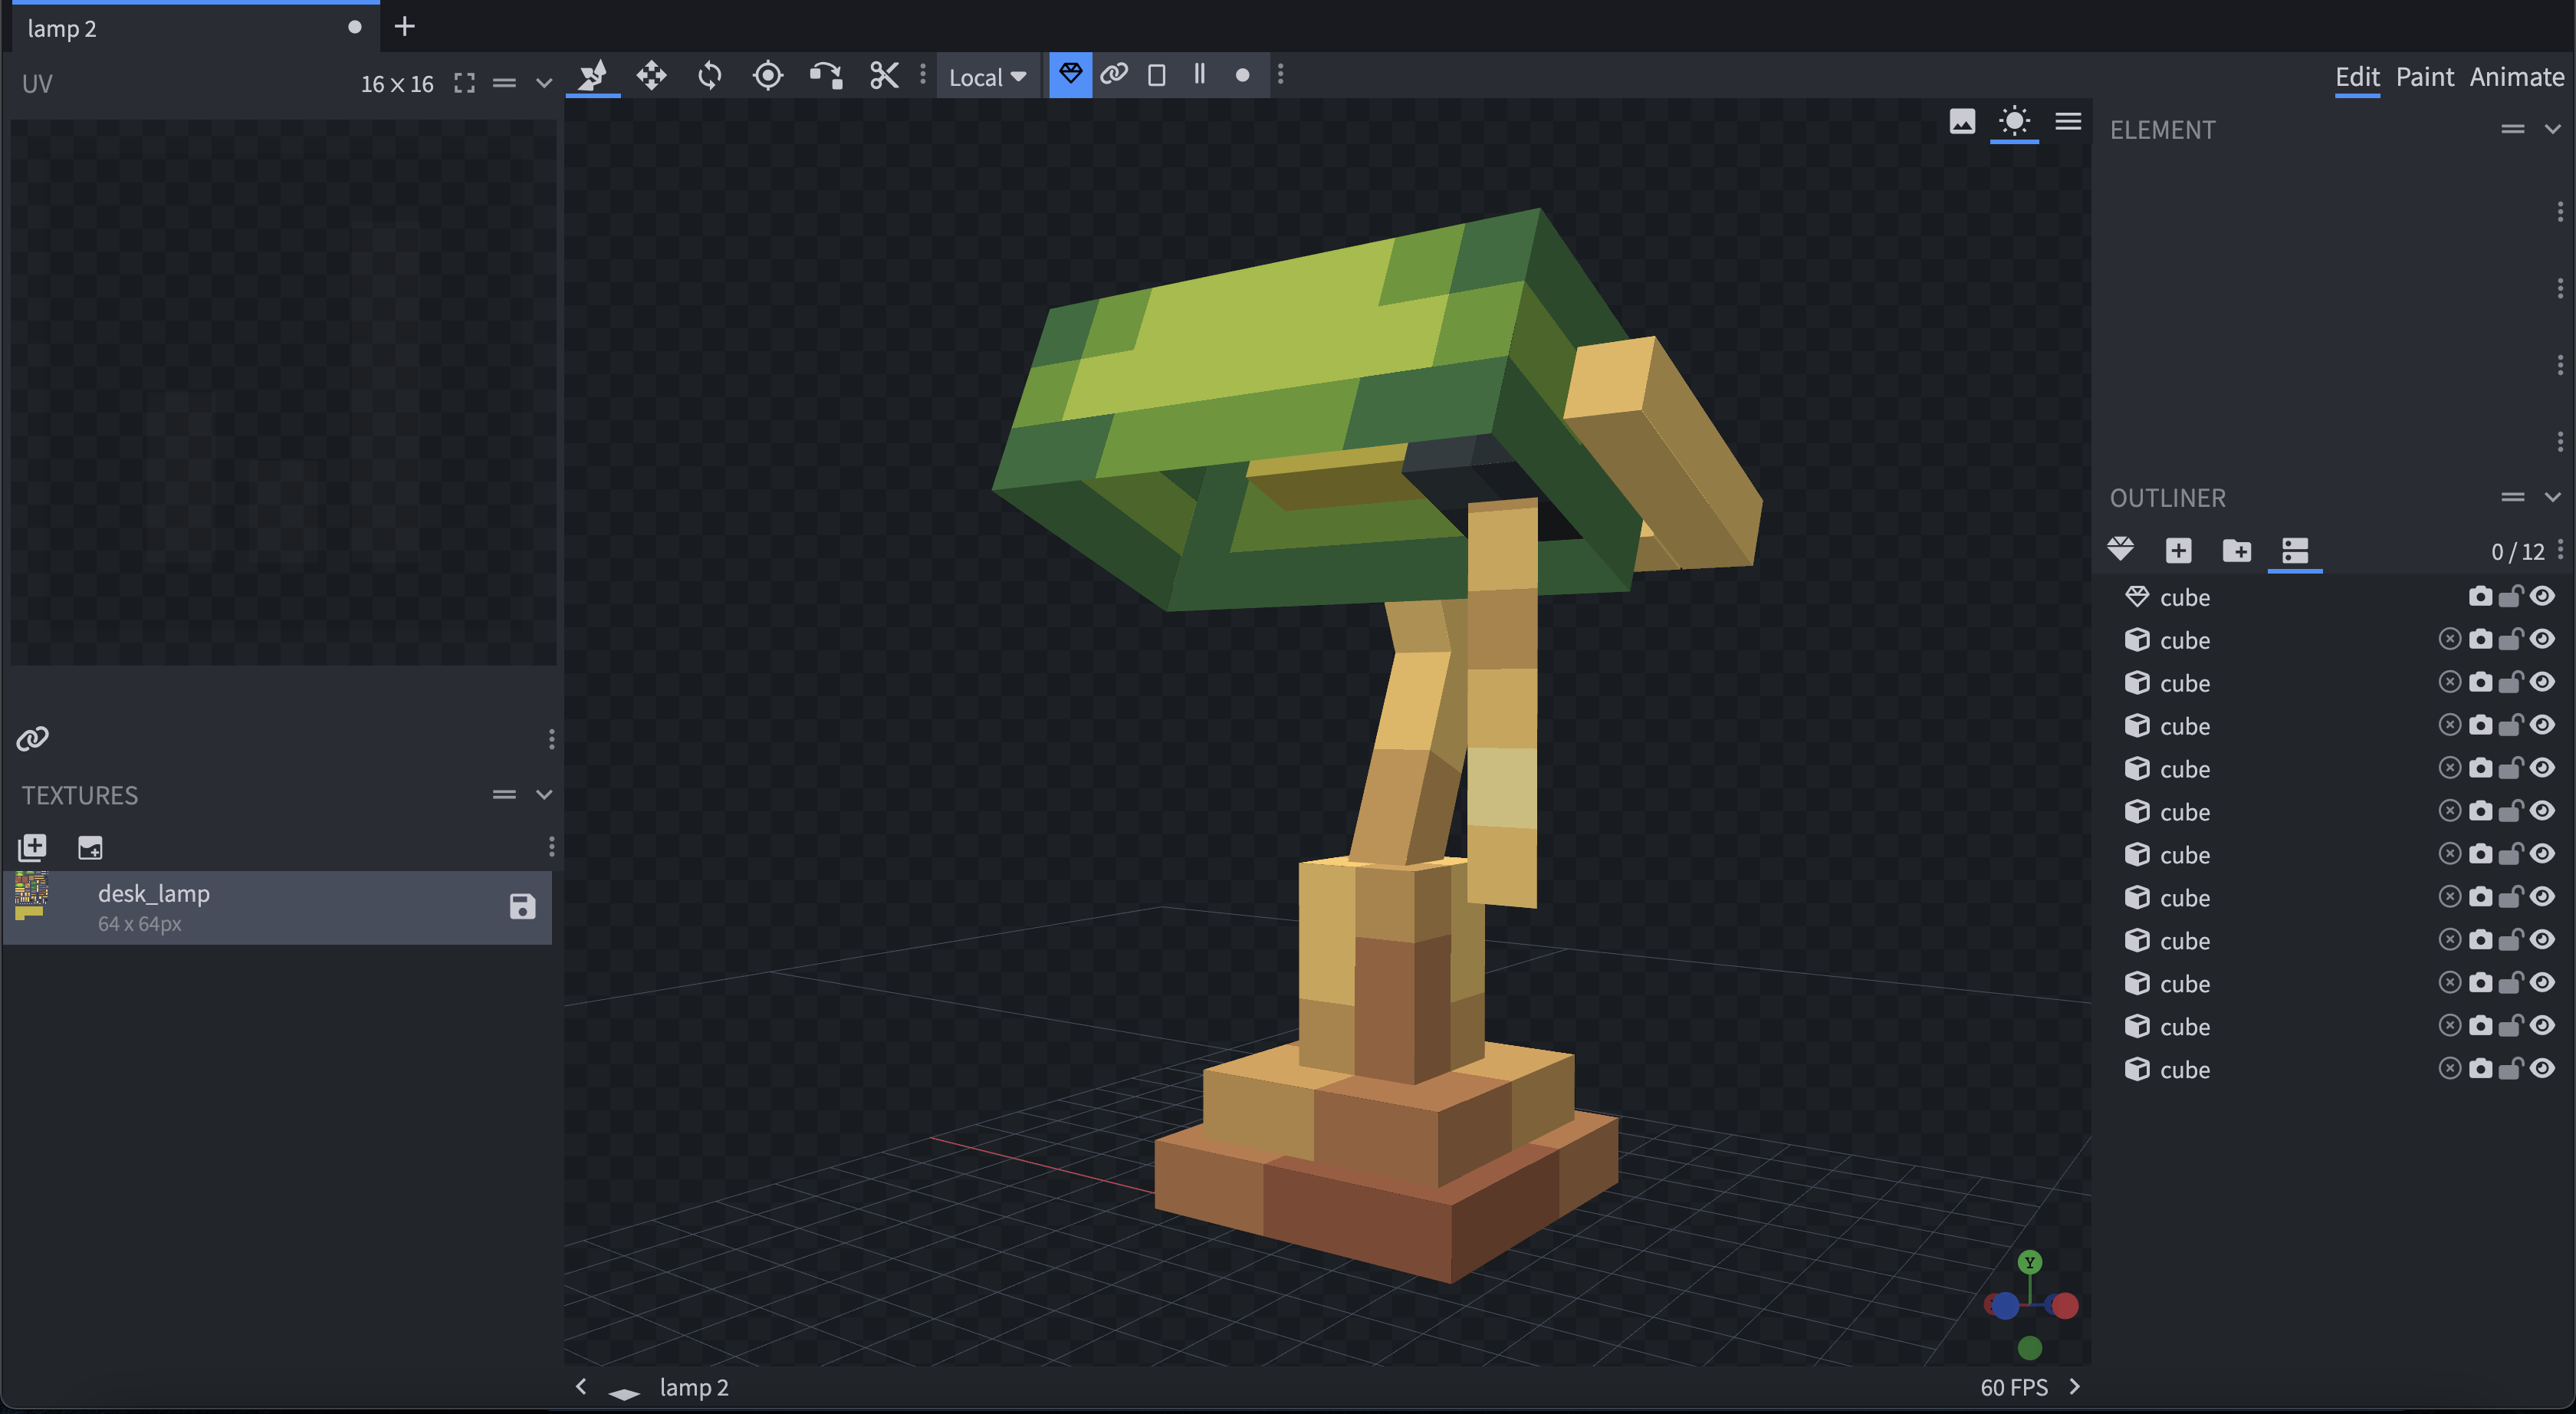
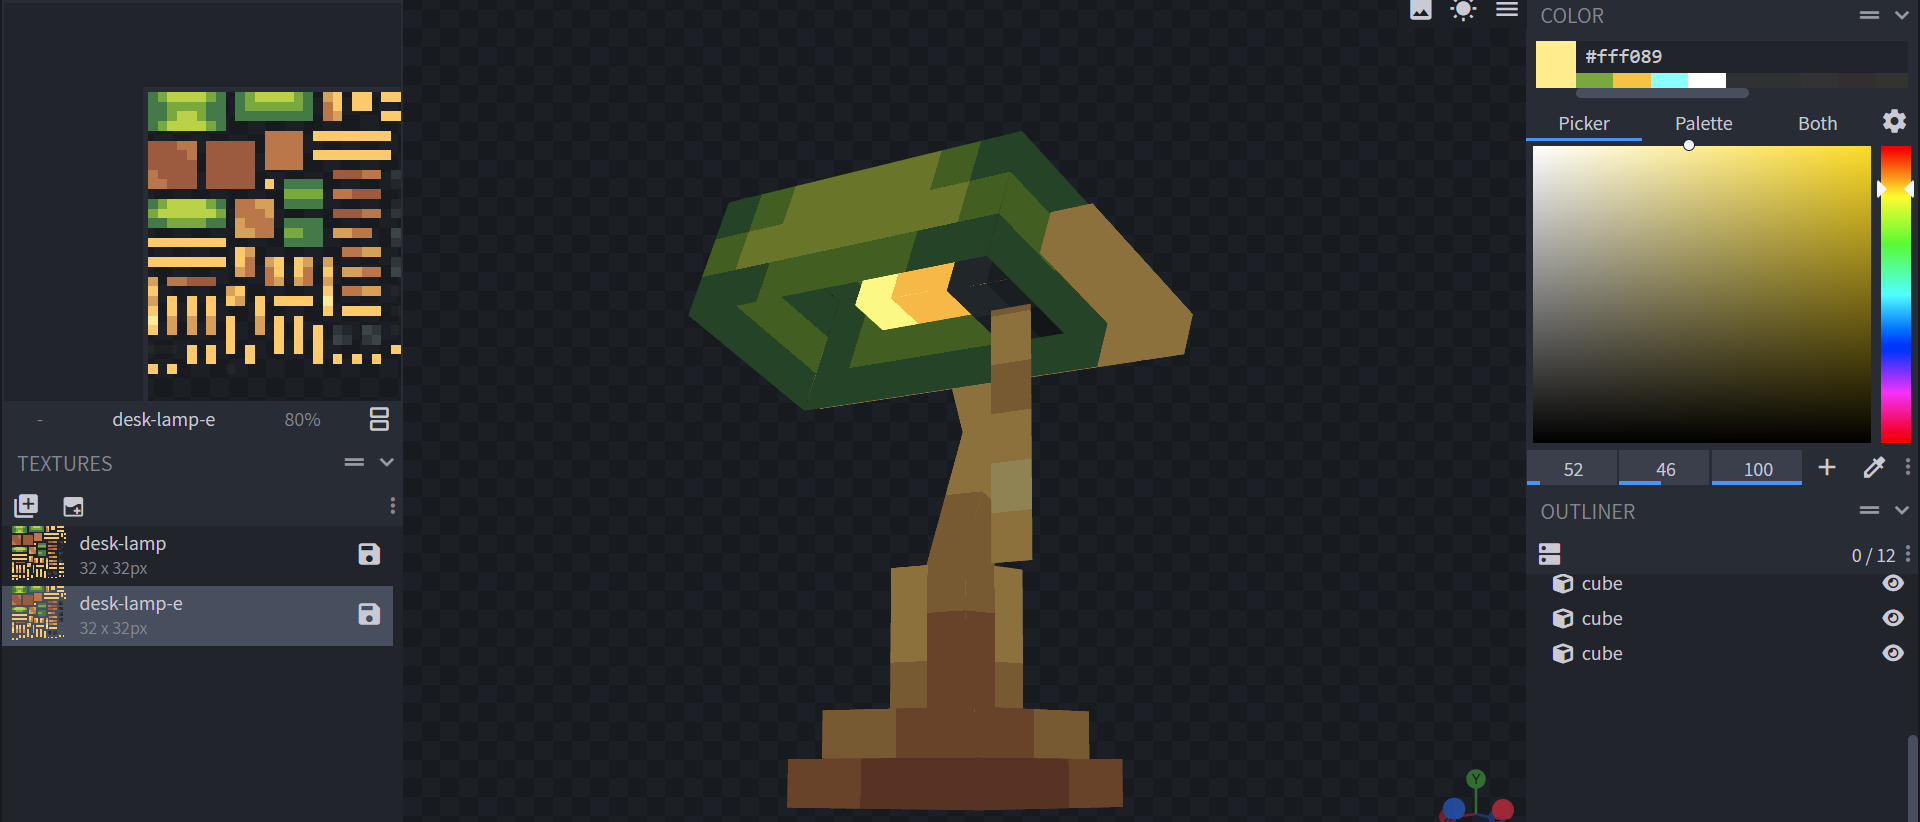
For this example we will use the following desk lamp model.
Blender
1. Making the emissive texture
In Blender, you can change the properties of textures through nodes in the shading tab. Unlike Sketchfab, Blender requires users to create a separate texture for the emissive elements and the elements that aren’t, since we are intended to edit the properties of each texture as a whole. If you would like to make multiple parts emit with a different strength for each, you need to make a separate texture for every object you want to have a different emission strength.
2. Exporting into Blender
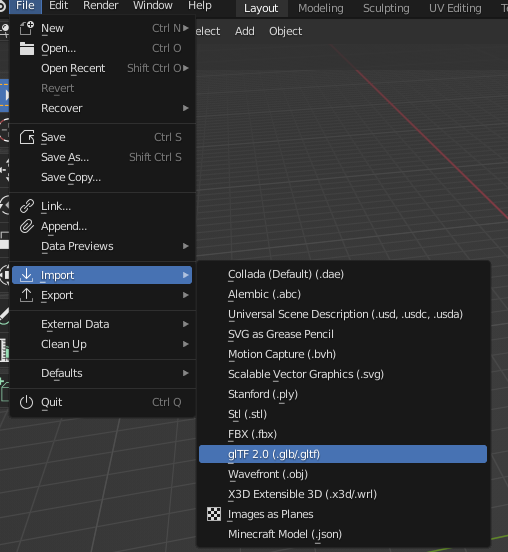
The easiest way to get your model, textures and animations into Blender is by exporting the model as a .gltf file via File > Export > Export glTF model. To import the exported gITF into Blender, select File > Import > gITF 2.0 and then select your file. Your model will appear gray; to see your textures, make sure you enable viewport shading in the top right.
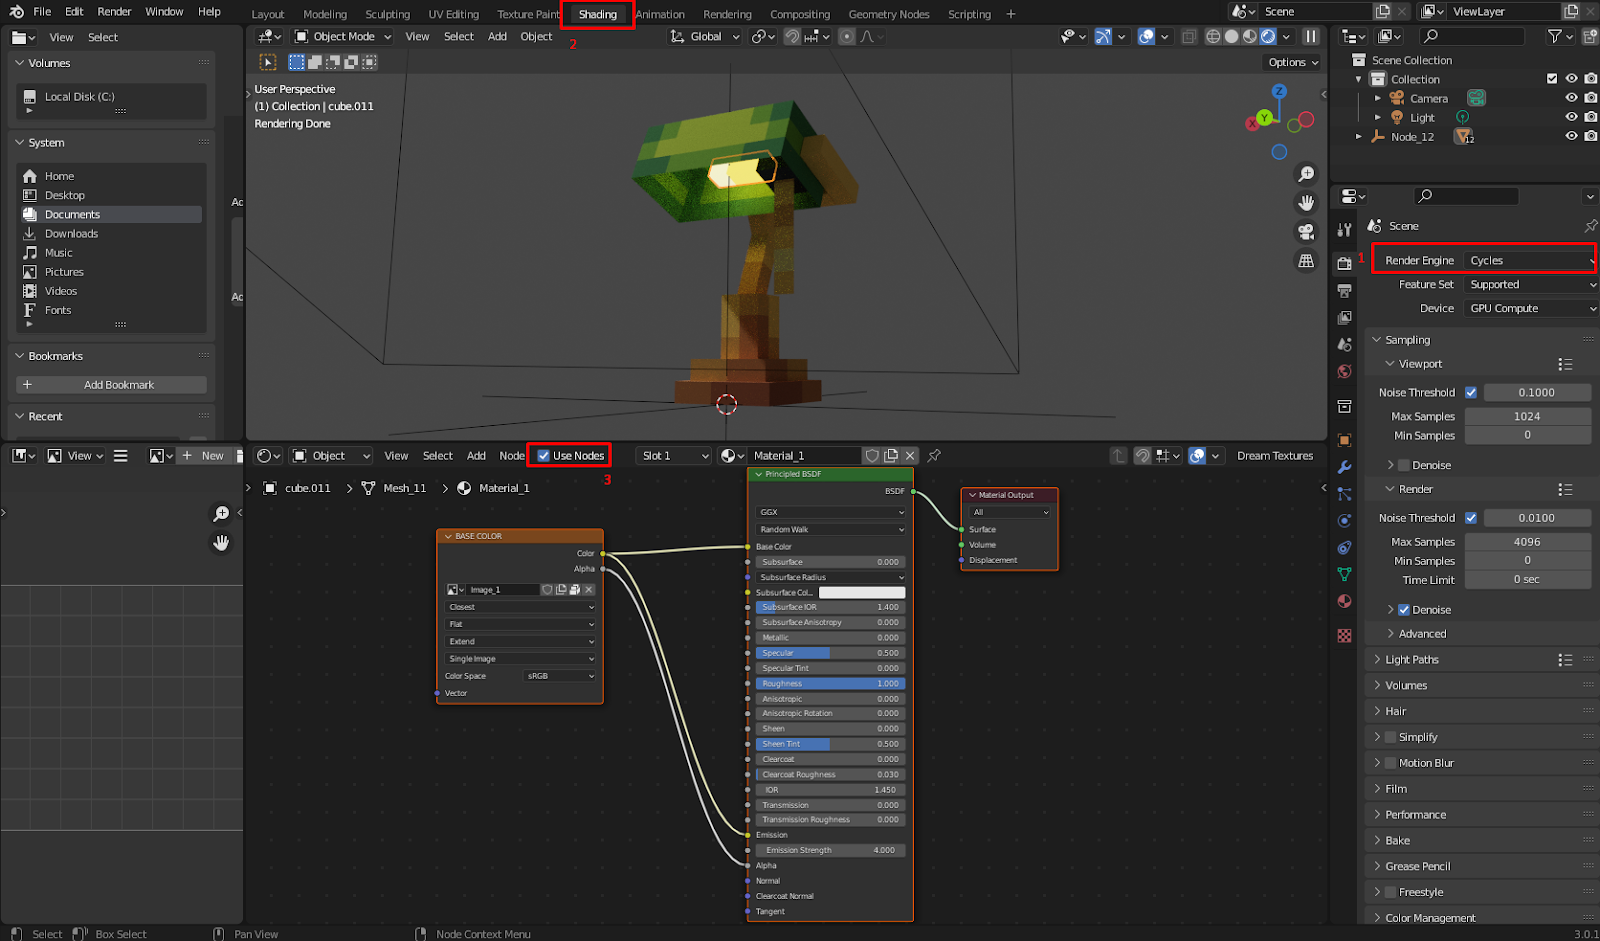
3. Configuring
For this example we will enable Cycles instead of EEVEE1 since it has light path tracing. If you want to know more about the differences between EEVEE and Cycles, check out the Blender Wiki.
Navigate to the shading tab2 and click the object you want to be emissive. Nodes should appear at the bottom (if they don’t, make sure the “Use Nodes” toggle3 is enabled). Next, drag the color output of the base color node to the emission input on the PrincipledBSDF node, which will make the object glow! If needed, adjust the emission strength you want accordingly, which you can find under the emission input.
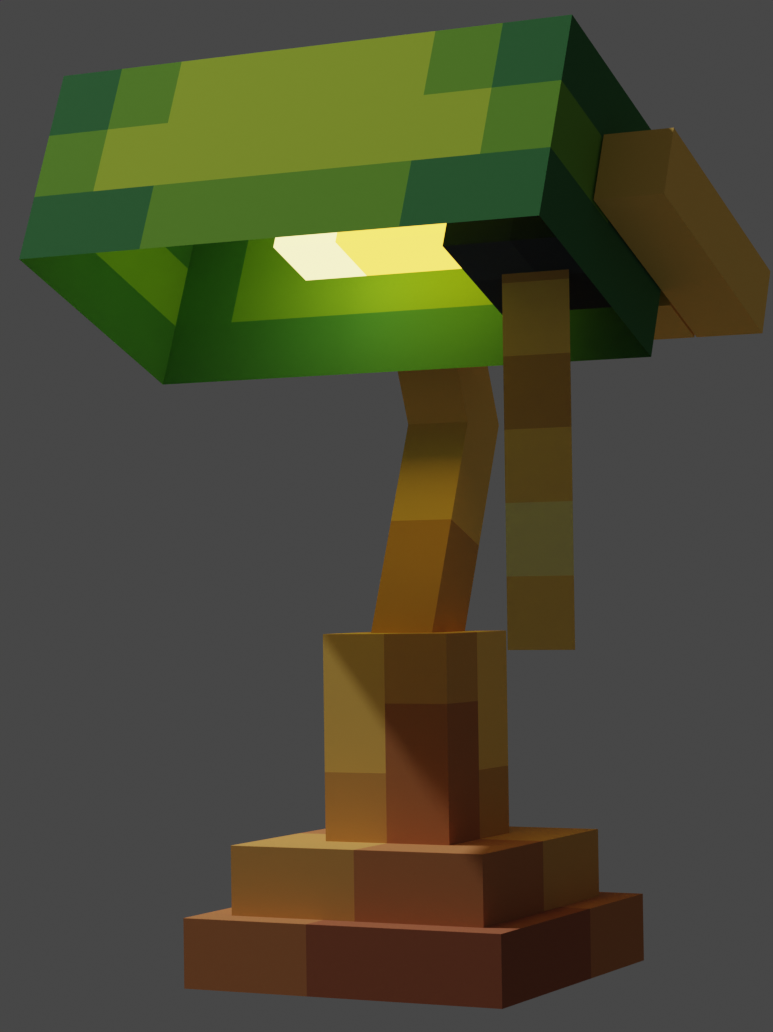
When you are finished, position the camera how you’d like and hit F12 to render your model, and download the final result.
Sketchfab
1. Making the emissive texture
In order for Sketchfab to know what parts need to glow, you need to make something called an emissive texture. This texture will tell Sketchfab what parts it needs to consider emissive, and what parts it should not.
To make an emissive texture, start by duplicating your texture. We will make changes to this new texture while leaving the main texture undisturbed. To distinguish between the two, it is recommended to rename the emissive texture to something else (for example, you can append -emissive to the name of the texture).
Important: Before duplicating, make sure the dimensions of the textures are a power of 2. It will not work correctly otherwise! (If they are not, you can resize the texture by right clicking it and selecting Resize, and creating a new template texture to make sure the UVs are fine.)

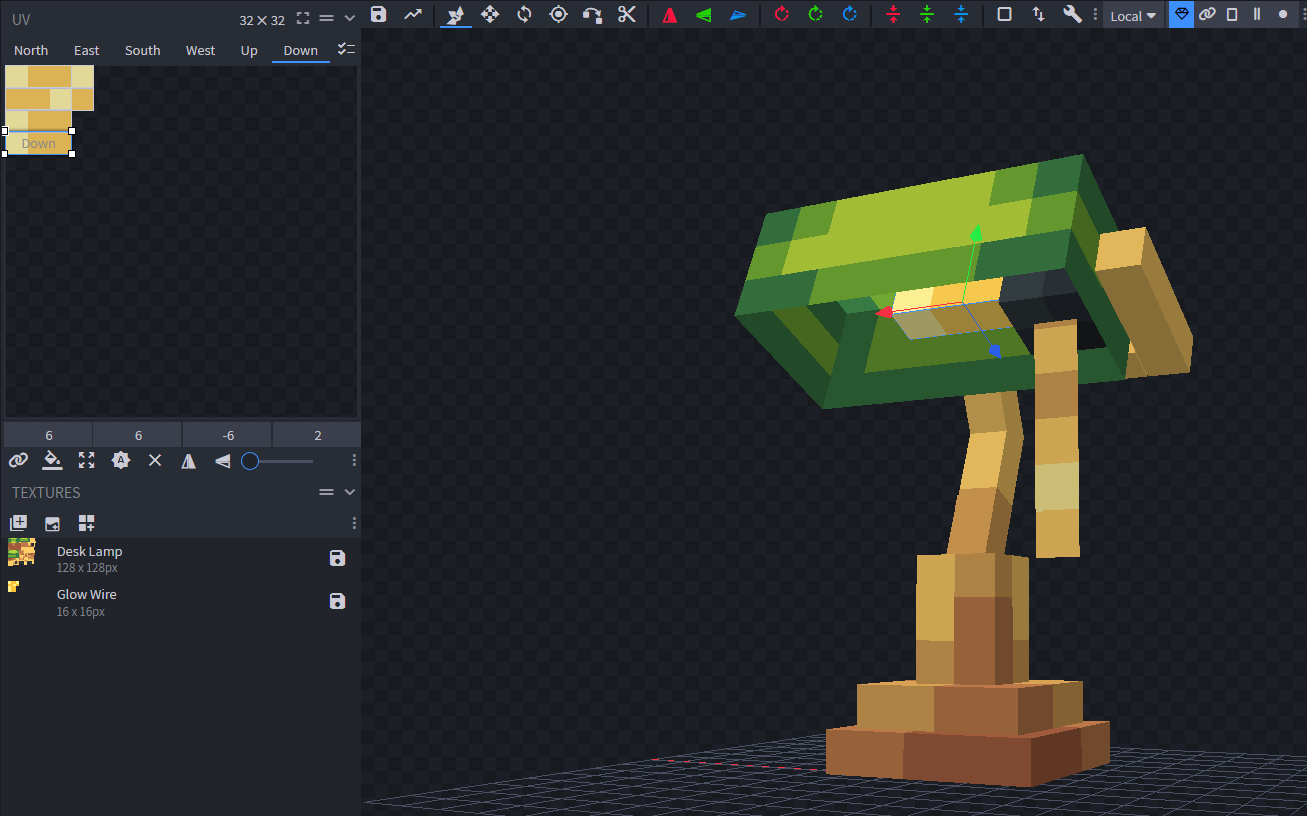
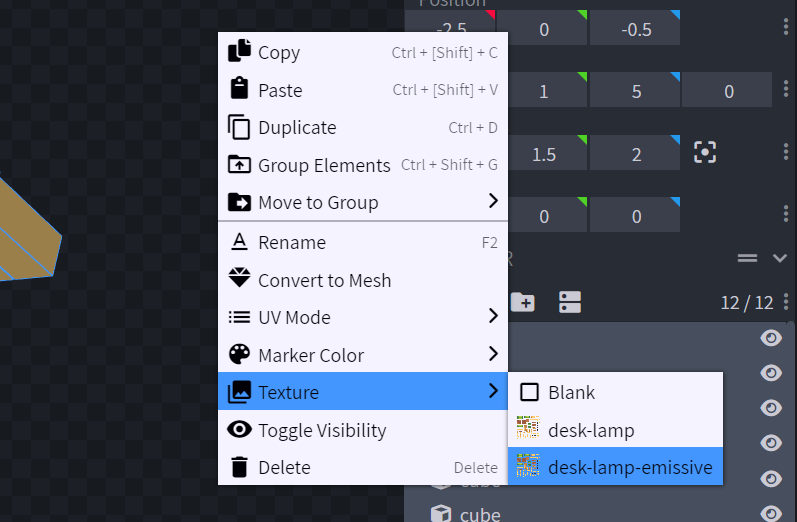
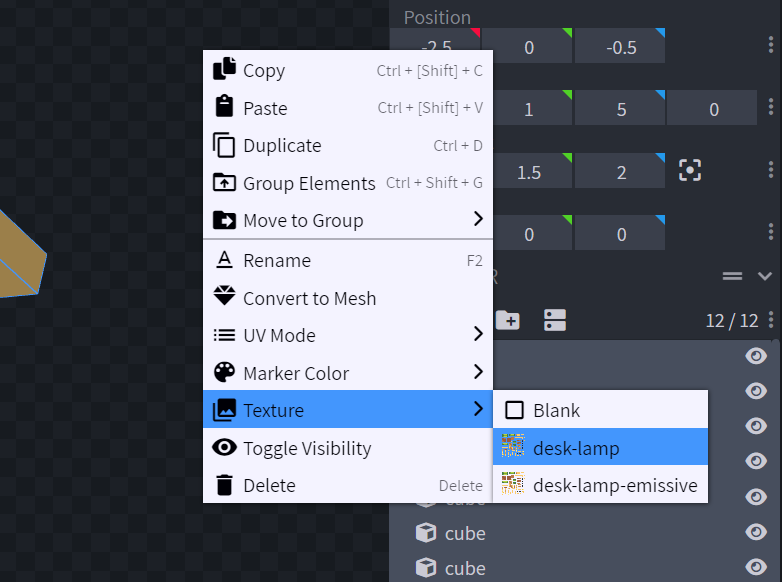
In order to visually see the changes we make to the texture on the model, we need to tell Blockbench to apply the texture to the model, as currently it's still applying the main one. To do this, select your whole model using Ctrl + A, and right click the cubes in the outliner. Then, select Texture > [Your Emissive Texture Name], as shown in the screenshot. Now, all changes we make to the emissive texture will be reflected visually on our model.
Our emissive texture is the exact same as our regular texture (which is why we duplicated our original texture), but will only highlight the parts we want emissive. There are many ways to go about doing this; this guide covers the built-in and usually preferred way of making an emissive texture.
To start, we need to tell Blockbench that our duplicated texture needs to be emissive. To do this, simply right click the duplicated texture and set the Render Mode to Emissive.

Next, we need to mark the elements we want to make emissive. To do this, select the eraser tool at the top toolbar, lower the opacity anywhere to around 1-247 (the higher it is, the stronger you will see the emissive effect in Blockbench), and erase the pixels you want emissive. This will cause the pixels to light up. It's extremely important you lower down the opacity of the eraser, or else you'll be undesirably completely erasing the emissive pixels!

TIP: In order to better see your changes to the emissive texture, lower down the brightness of Blockbench's preview in File > Preferences > Settings.
If you've done everything correctly, you should see something like this - the parts we want emissive should be brighter than the rest of the model:
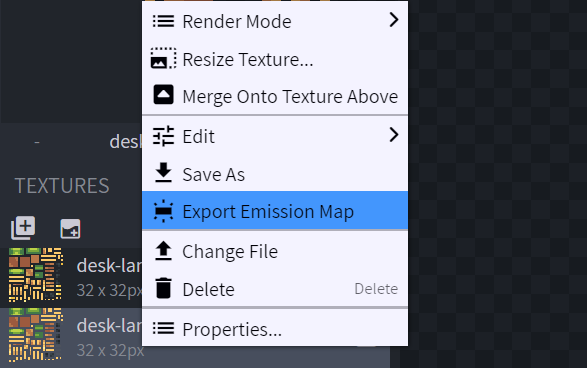
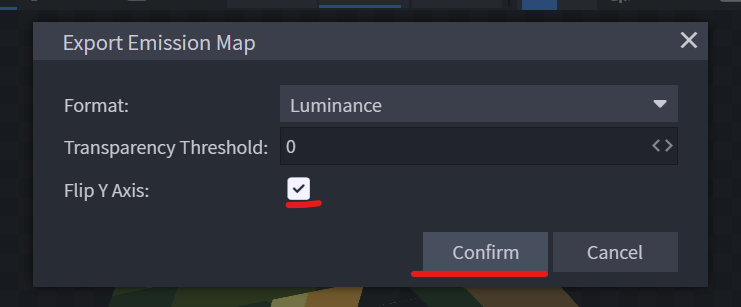
Lastly, to export the emissive texture, right click the texture and select Export Emission Map. Keep the settings as default, but make sure to check the Flip Y-Axis checkbox since Sketchfab automatically does this with our regular texture.
2. Exporting to Sketchfab
Currently, our model still has the emissive texture applied to it. To make the model apply the original texture we made, we need to do the same thing as before: press Ctrl + A to select the whole model, right click the cubes, and click Texture > [Original Texture Name]. The model should look like what it was before without the emissive parts being brighter than the rest of the model.
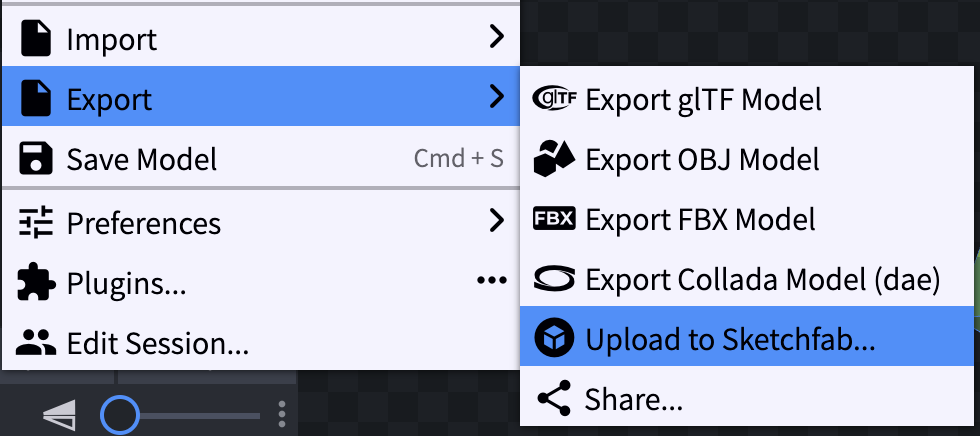
We can now export our model to Sketchfab. Luckily, Blockbench provides a quick way to do so. Simply go to File > Export > Upload to Sketchfab, fill out the required information, and then press Confirm. Doing this should show a prompt which allows you to view your model on Sketchfab.
Upon clicking this prompt, we are redirected to the Sketchfab website where we can start rendering our model. Since we are concerned about the emissive textures specifically, that's what we will be primarily focusing on.
3. Configuring
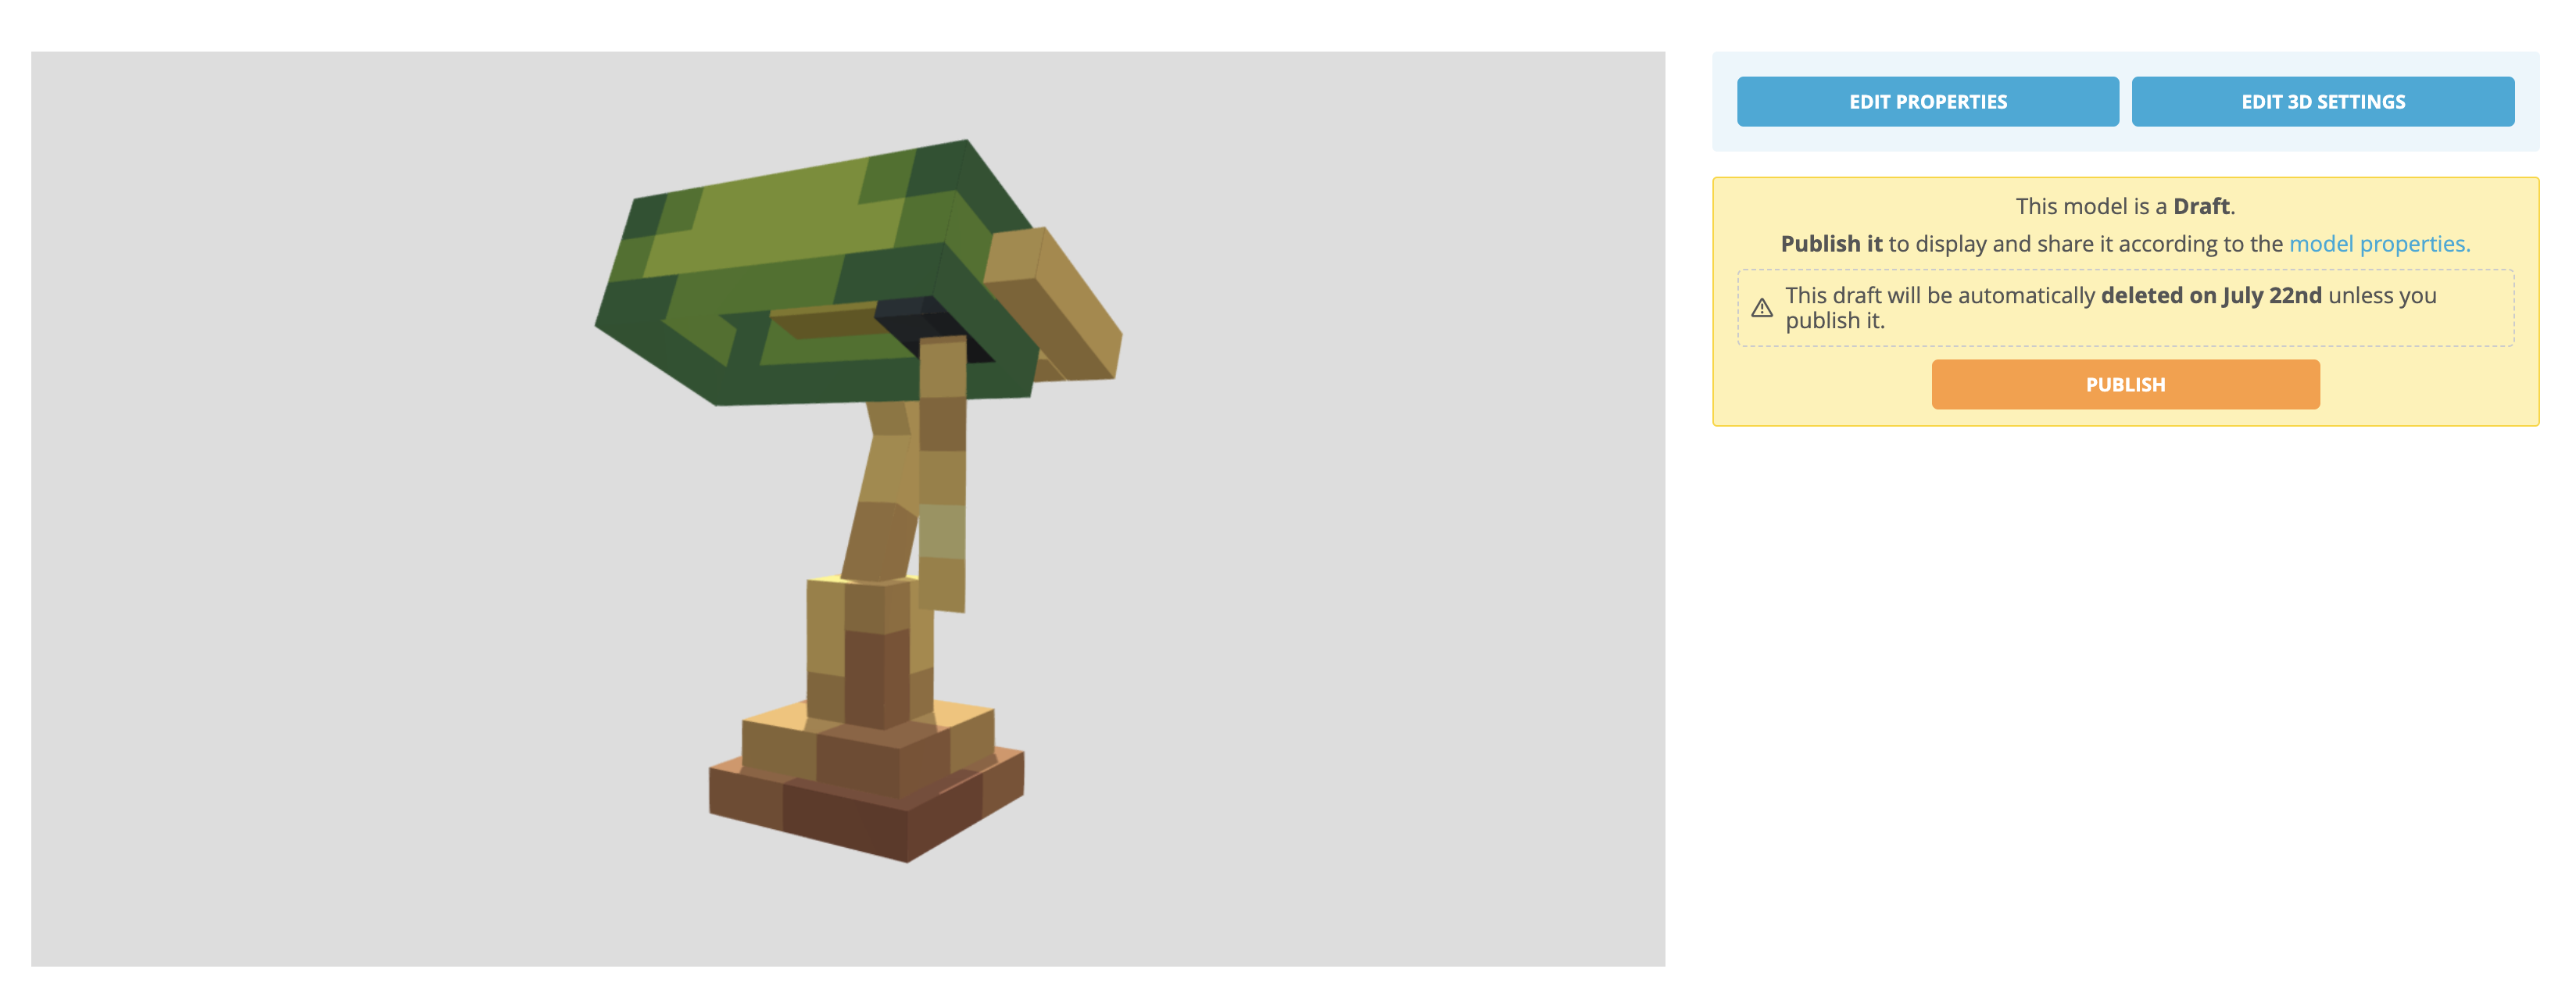
Currently, you should have a screen similar to this:
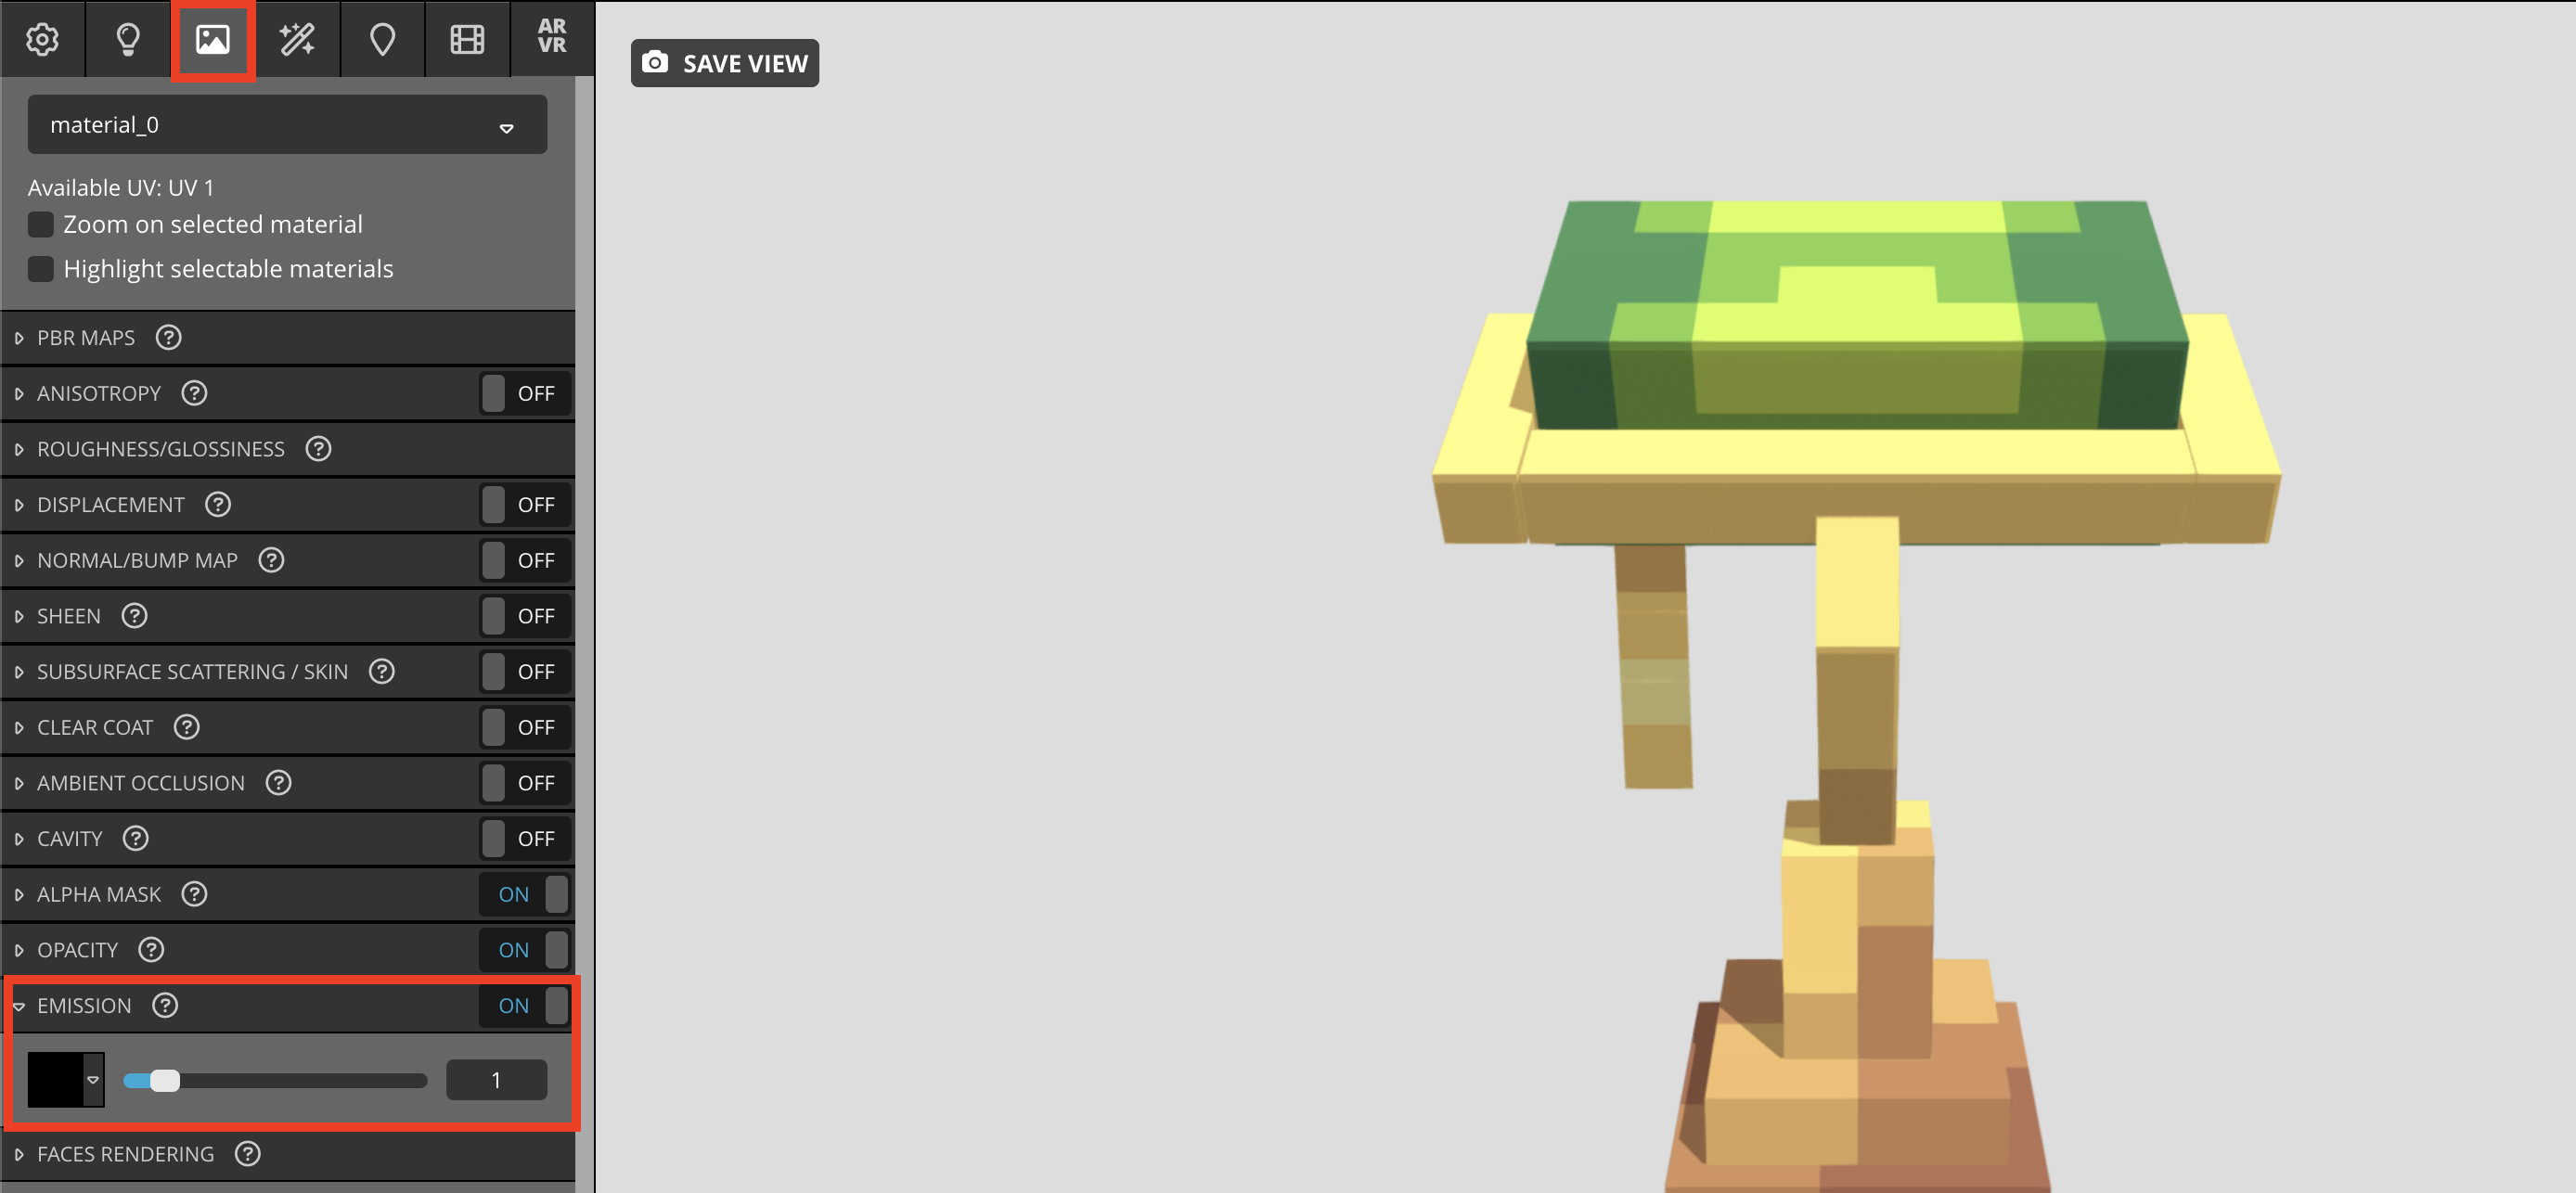
To get started with rendering your model, press the blue Edit 3D Settings button at the top right of the screen. Here, we'll be met with a bunch of panels accompanied with our 3D model, all of which are rendering settings and options that you can configure. For now we'll bypass the other rendering options and get straight to using our emissive texture.
Everything regarding emissive textures is located in the Materials tab, as marked in the image. This tab not only allows us to configure our emissive texture, but also stuff like opacity. Each one of the collapsible categories are different types of settings we can configure for our model. For now, scroll down until you find the Emission category:
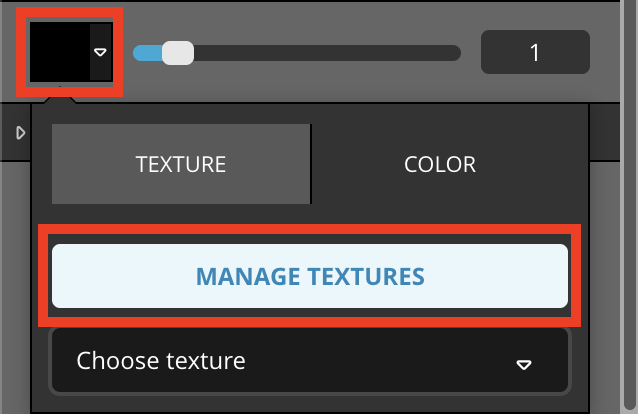
Next, we'll need to upload our emissive texture which is saved on our computer. To do this, click the color picker, select the Texture panel, and click Manage Textures.
Once you find yourself in this menu, click the blue Import Texture button and import your texture. And ta-da, we have ourselves a working emissive texture!
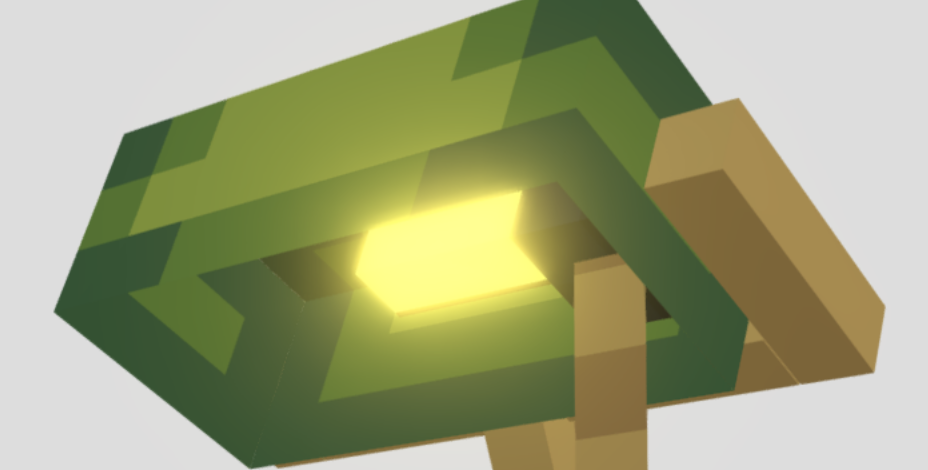
From here, feel free to mess around with any of the other settings provided to you to touch up and finalize your render. For example, you may consider changing the background image, adding bloom, or maybe adding some drop shadows. For example, the image above is the emissive texture applied with bloom.
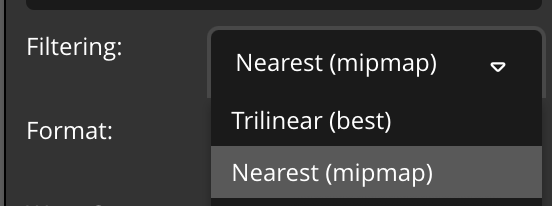
It's also important to mention that Sketchfab gives us easy ways to manipulate the way the emissive texture applies to the model. For example, the default render mode is "trilinear", but we can change it to "nearest" as well.
And here's our final result!