
Rendering Models
To get an image of your Blockbench model with realistic lighting, you need to render it in an external program. This article will go over the most popular rendering programs and explain how to create a render of your model.
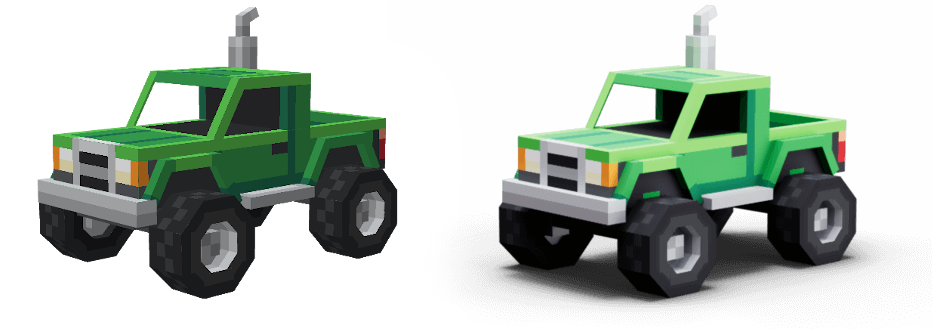 The difference between the Blockbench preview (left) and the final render (right)
Software choice
The first step is choosing a rendering program. Usually, The higher the render quality and the more options you need, the harder the program is to learn.
| 3D Viewer | Sketchfab | Light Tracer | Blender | |
|---|---|---|---|---|
| Difficulty | Very Easy | Easy | Medium | Hard |
| Quality | Low | Medium | High | High |
| Features | 1/10 | 4/10 | 6/10 | 10/10 |
| Raytracing | - | - | Yes | Yes, with Cycles |
| Transparent Background | Yes | Yes | (Paid) | Yes |
| Platforms | Windows | Web | Windows, Mac | Windows, Linux, Mac |
| Price | Free | Free | Freemium | Free |
Windows 3D Viewer
The default Windows 3D Viewer is an easy to use, but limited viewing and rendering program for 3D models. You can render your model from different angles and set up light sources around your model.
Sketchfab
Sketchfab is an online platform for sharing 3D models, similar to what YouTube is for videos. When uploading your model, you have a number of options to configure how your model is presented, including background, lighting, and rendering effects.
Due to the features of the 3D editor, Sketchfab is also a great option to render your models.
Light Tracer
Light Tracer is an app that is focused on rendering. It is a big step up in quality compared to Sketchfab and 3D Viewer, but is is still very easy to use.
Light Tracer has a free browser app that has limited functionality but can still produce great results. The desktop app with full featureset is available as a subscription or a one-time purchase for $49 USD.
Blender
Blender is a professional 3D modeling and rendering software. It has essentially unlimited options, but also comes with a steep learning curve. Blender has a similar feature set to paid 3D programs, such as Cinema 4D, 3ds Max, and Maya. If you have one of those programs, you can use them for rendering as well.
How to render
Before you import your model into your rendering program of choice, you need to export it in a compatible format. The format glTF is recommended for this, since it is compatible with all programs in the list, it saves everything into one file, and it even supports model hierarchy and animations. Export your model via File > Export > Export as glTF.
Windows 3D Viewer
Right click the exported glTF file and select Open with > 3D Viewer.
You can select a lighting preset in the sidebar. Below that, you can fine-tune the parameters of each light source.
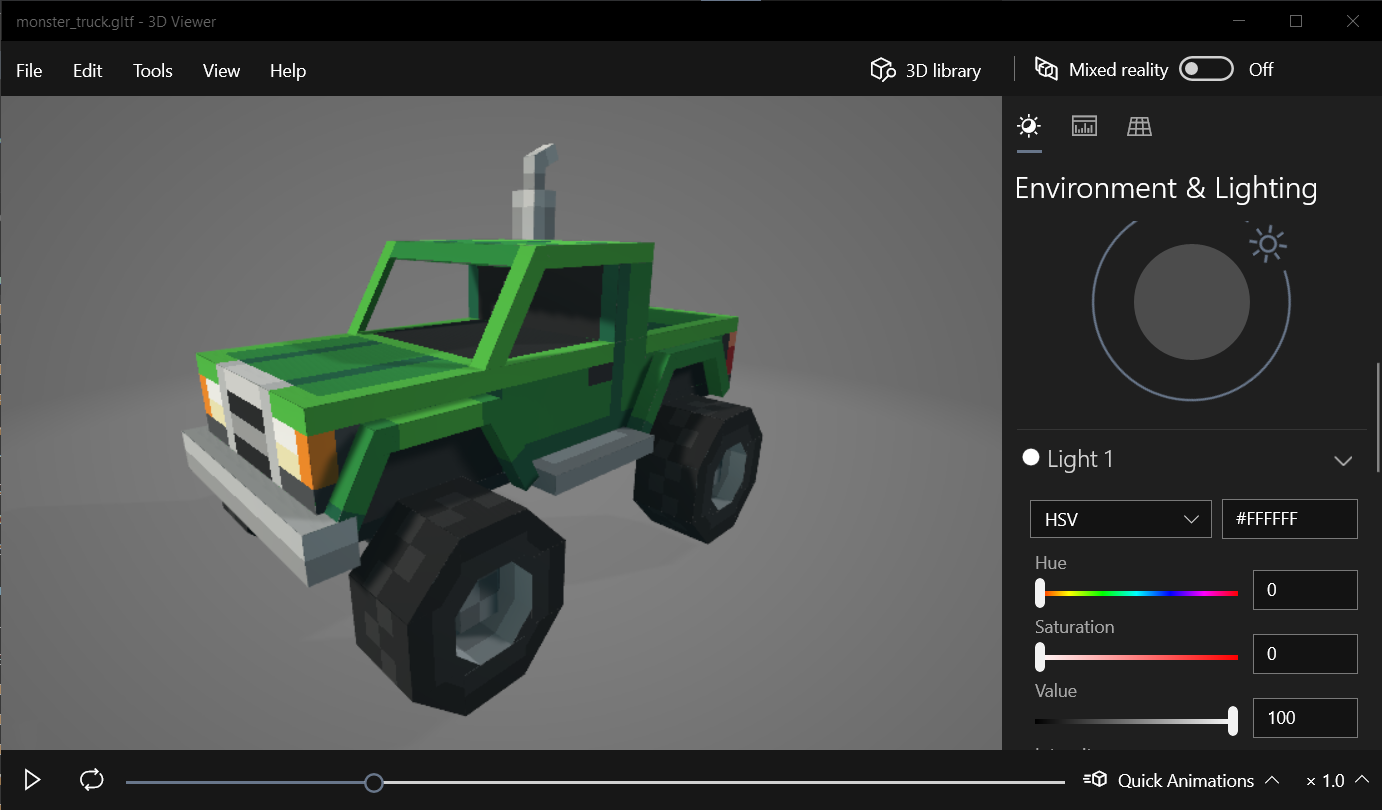
Once you are happy with your lighting and camera angle, go to File > Export Image. Select the desired resolution and export options, and press Export.
Sketchfab
Uploading a model to Sketchfab is a built-in feature of Blockbench. Go to File > Upload to Sketchfab..., fill out the model metadata and follow the instructions to get your access token.
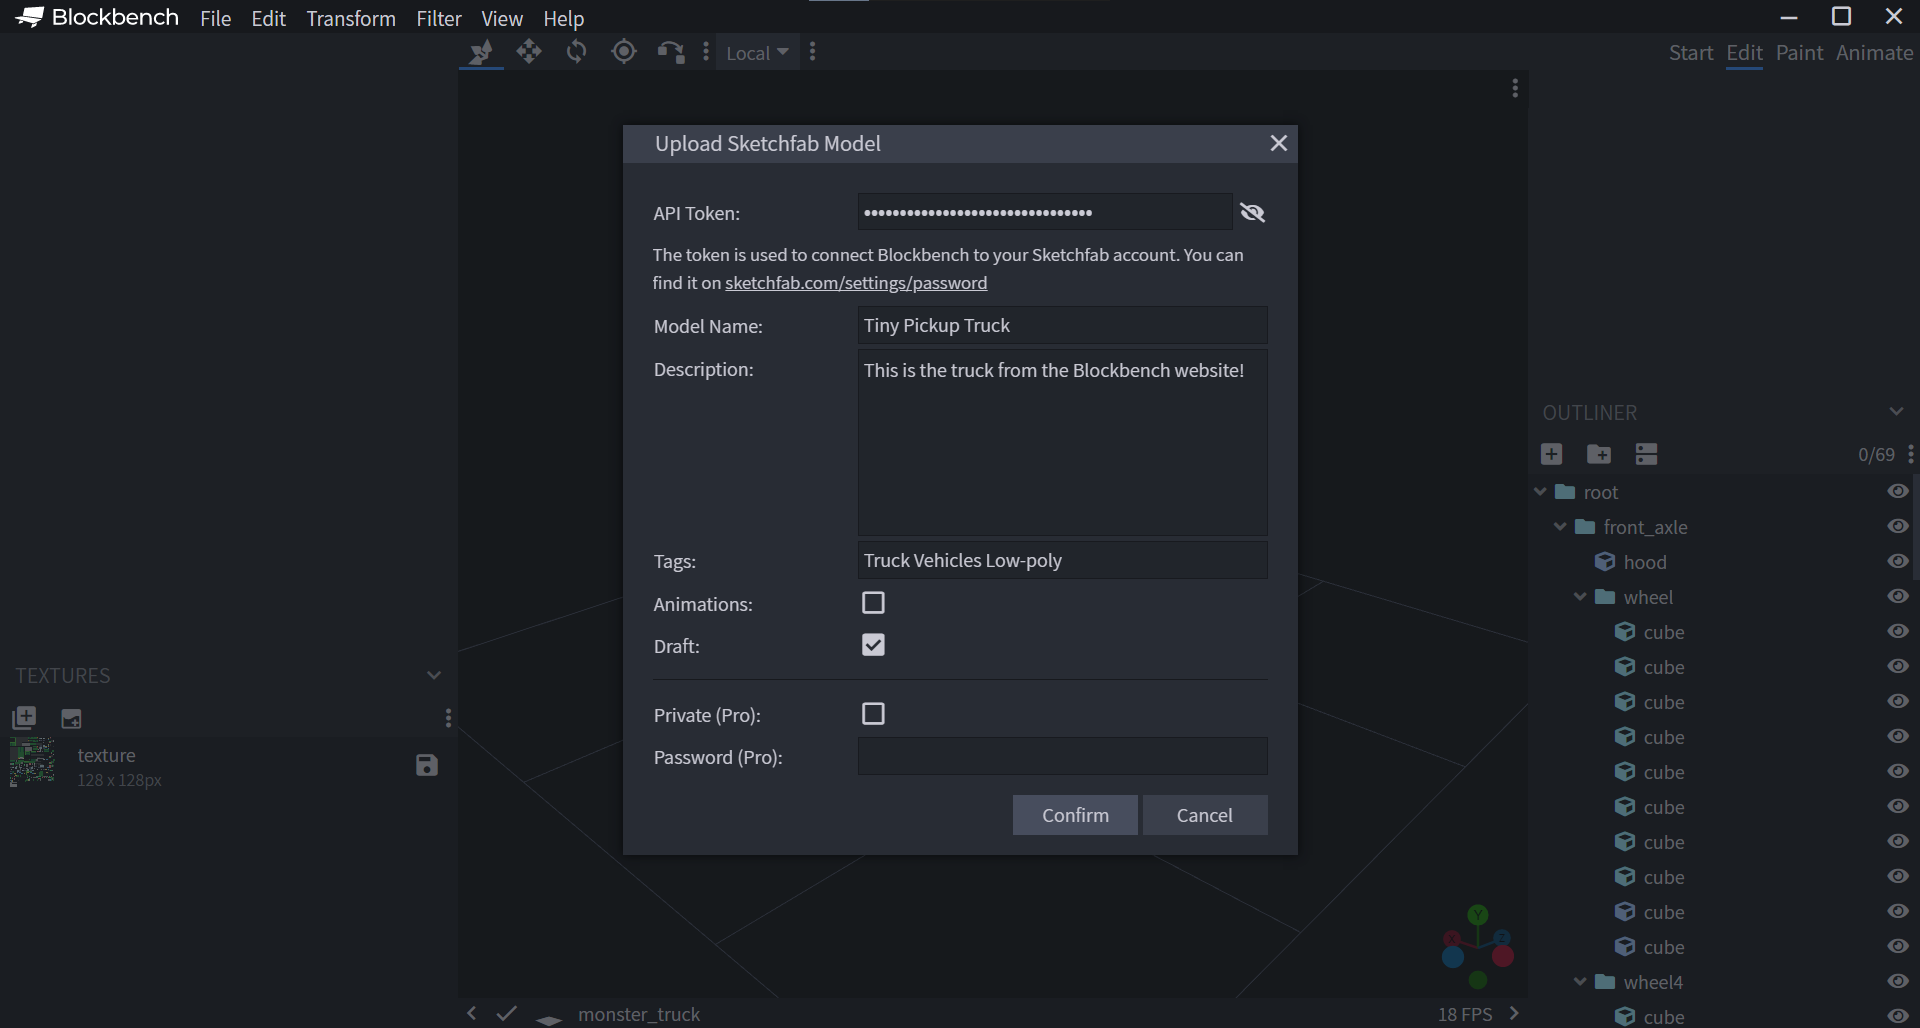
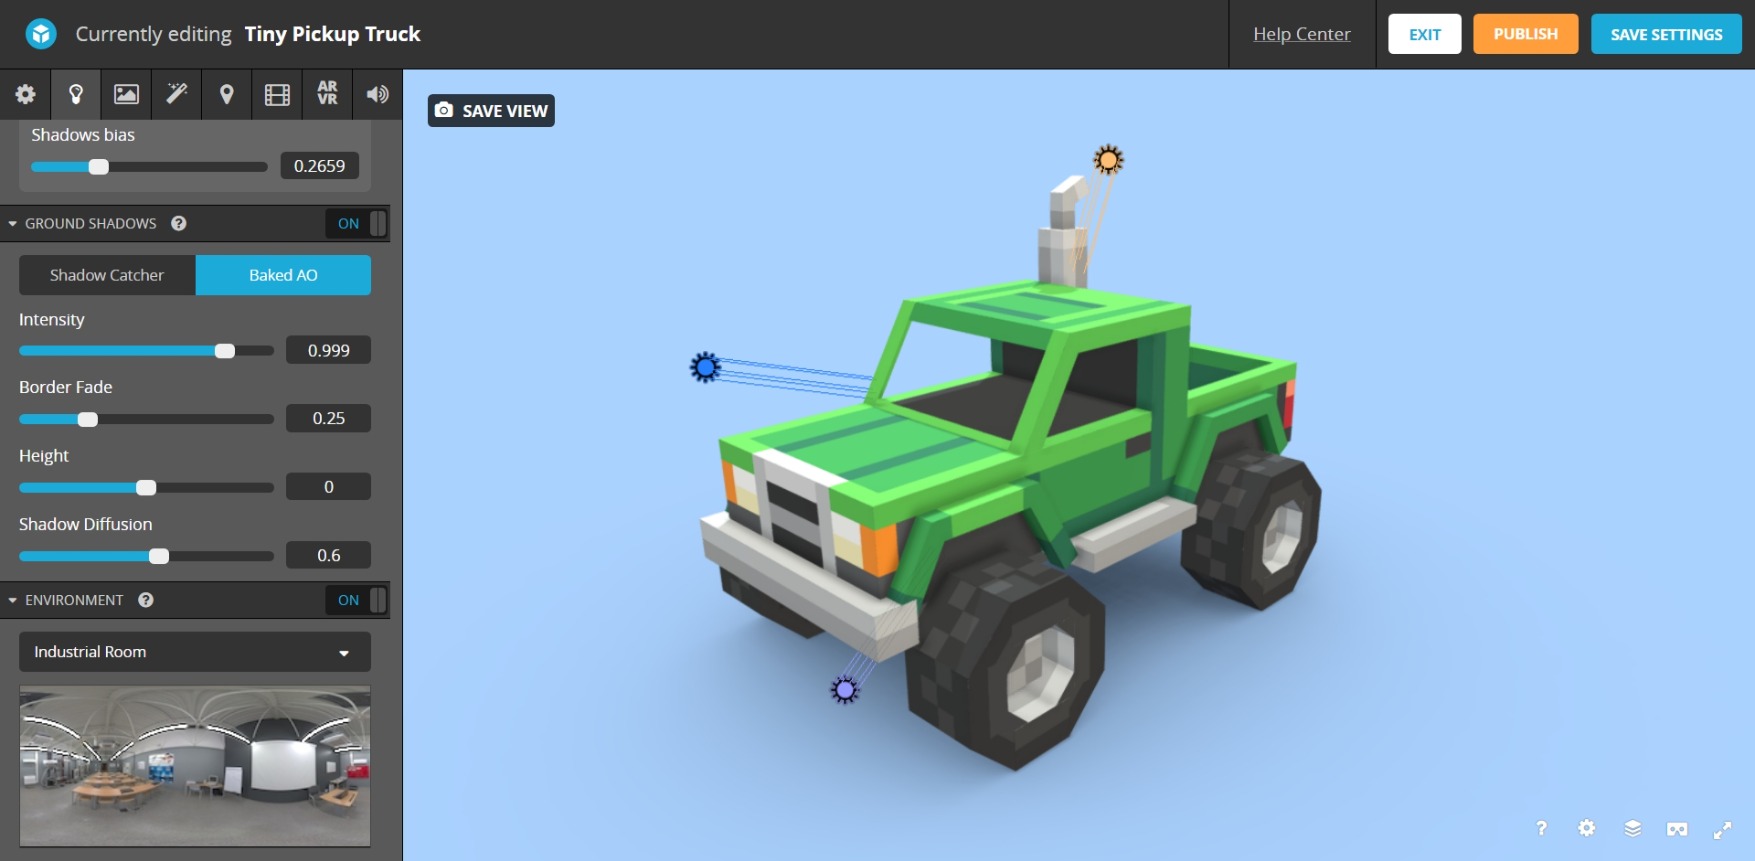
Once your model is uploaded, click Edit 3D Settings to access the 3D editor.
In the 3D editor, you can configure the lighting, background and effects of your model. To learn more about lighting on Sketchfab, read How to Fine-tune your Lighting and Shadows on Sketchfab.
Once you are happy with the result, one way to export your image is to simply take a screenshot. Most web browsers have a built-in screenshot feature. You can also take a screenshot by pressing Windows Key + Shift + S on Windows or Command + Shift + 4 on macOS.
If this isn't enough, you can also use Sketchfab's Screenshot tool. This allows you to specify an image resolution or export with a transparent background.
Light Tracer
Open the Light Tracer Browser App or the desktop app if you have it, and drag your model glTF file from your file browser into the program. On the dialog that pops up, press Replace.
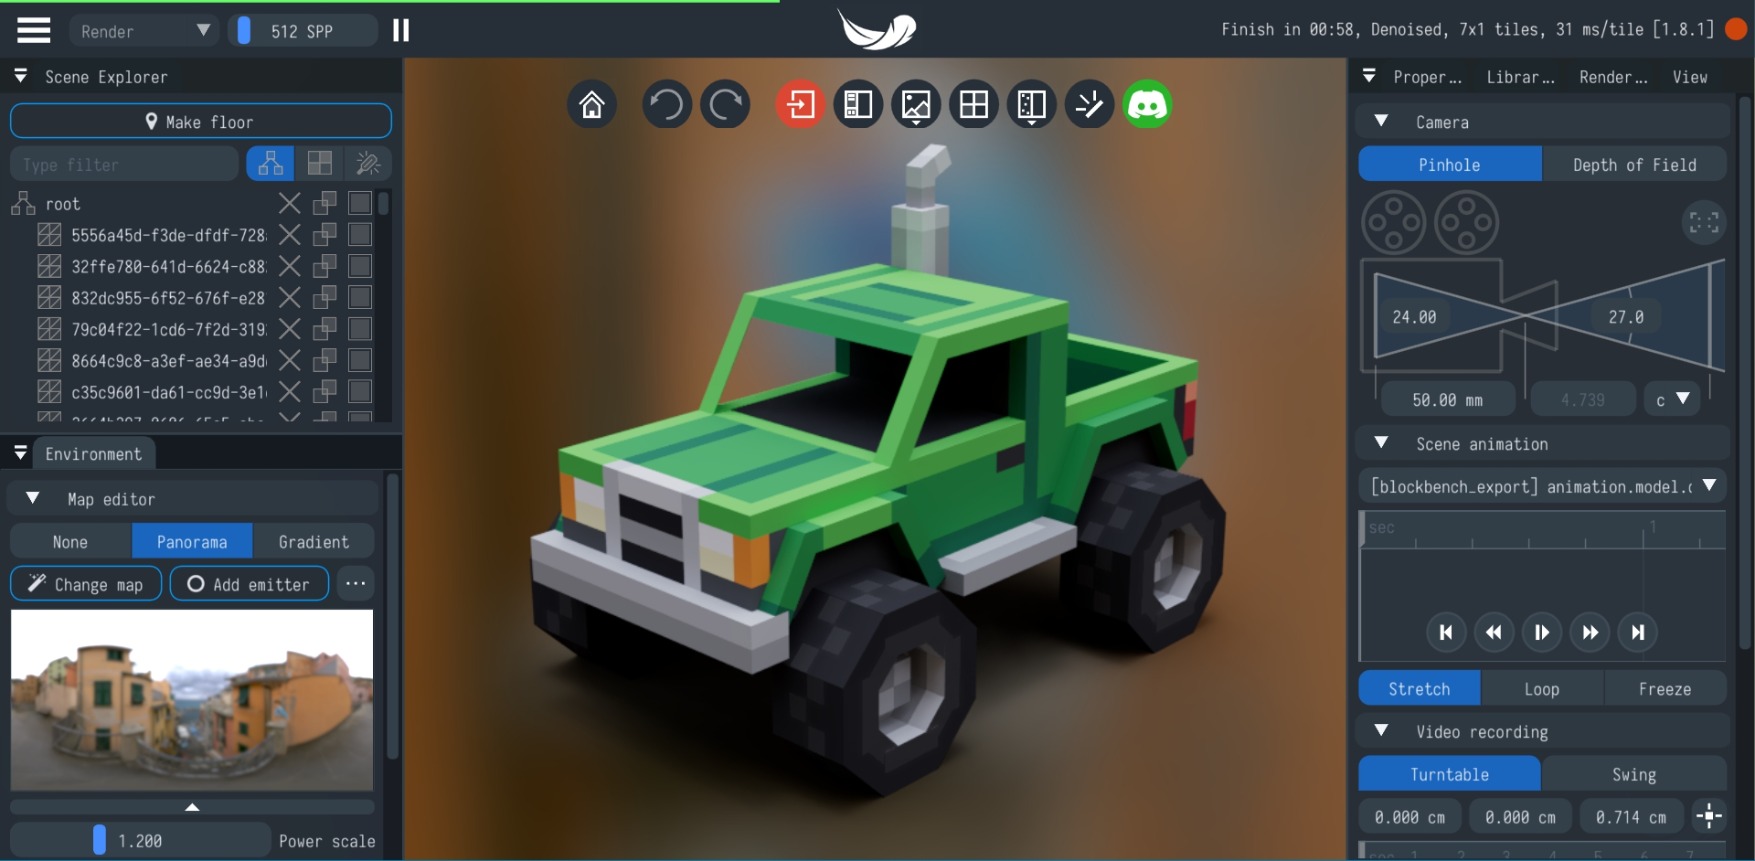
You can position your camera using the left and right mouse button. In the Scene Explorer on the left sidebar, press Make floor to create a ground plane to catch shadows under the model.
In the map editor, you can create an environment map, which is basically an image that wraps around your model to control where light comes from. You can adjust the rotation and intensity of the map and add additional light sources.
In the paid version, you can also configure a back plate, a custom background that differs from the environment map. Select Gradient and lower the alpha value of both colors to 0 to get a transparent background.
Once you are happy with your angle and lighting, press the Save render to image button that is located in the center above the model. This will export your model as an image.
Blender
You can download Blender from Blender.org - Download.
After opening Blender, make sure to delete the default cube by pressing Delete and confirming the pop up. Now navigate to File > Import > glTF 2.0, and open your model file.
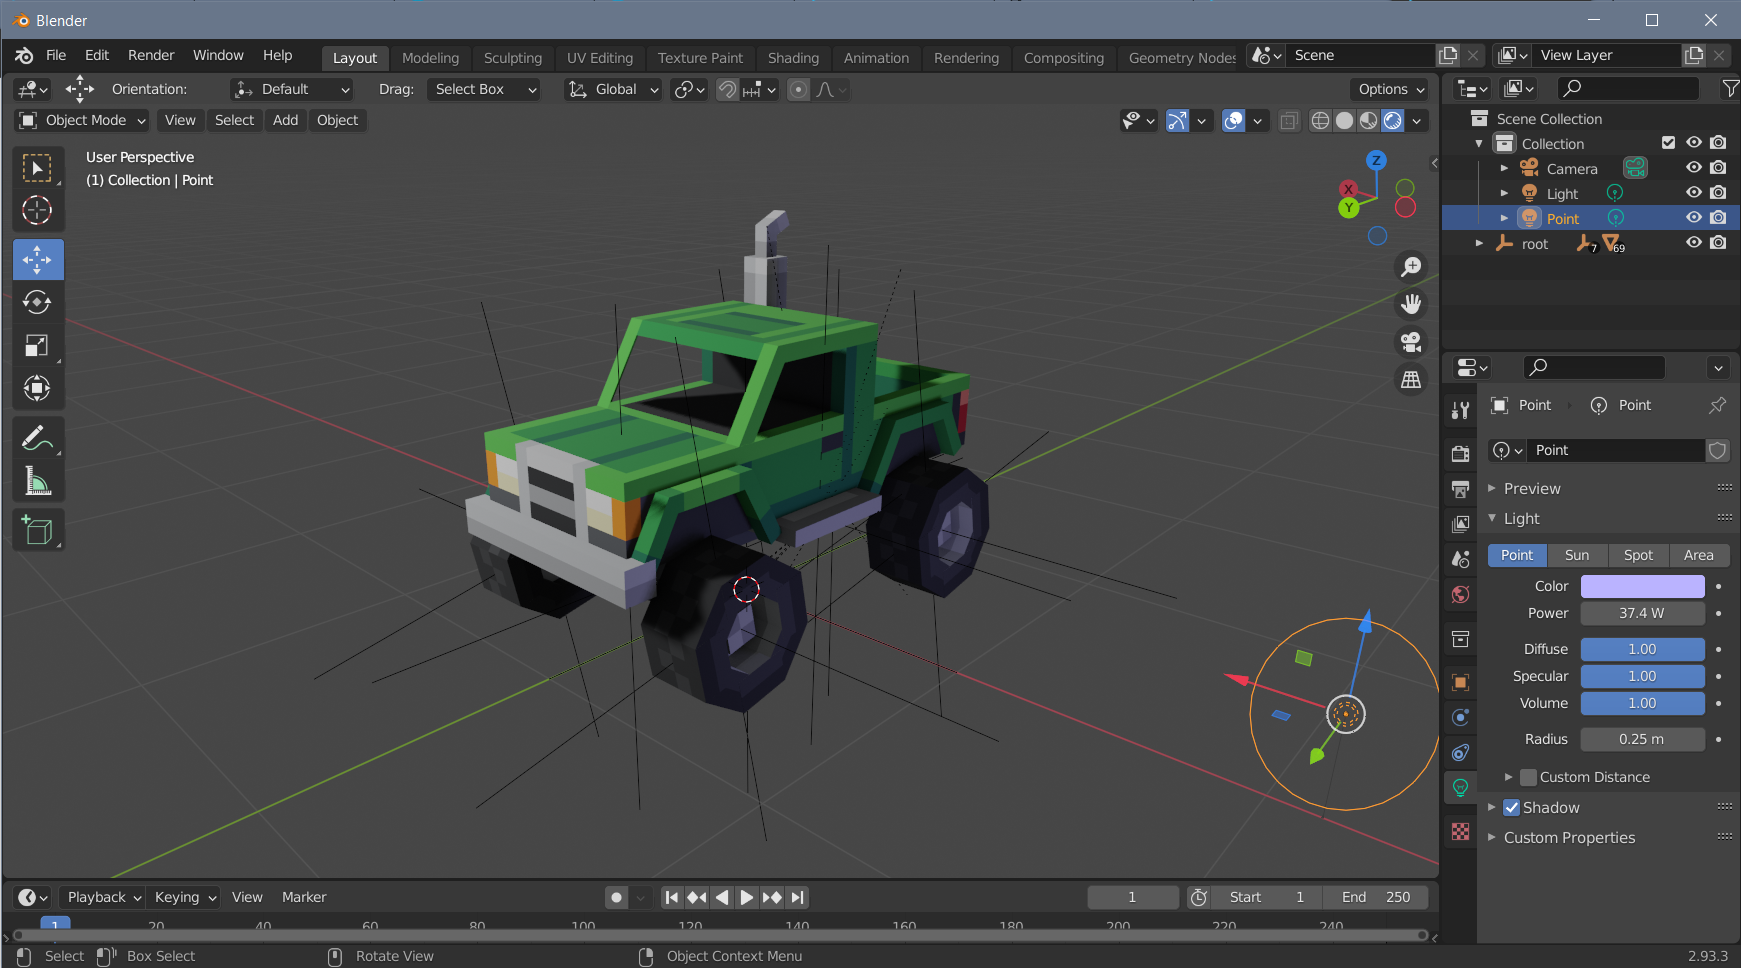
This article won't go in depth about setting up the camera and lighting in Blender, but here is a great tutorial video about it.
Once you are happy with your lighting, press F12 to render your model. Go to Image > Save to export your render as a PNG image.